Log in

MISSION CONTROL
Start the video below to hear the transmission from the spaceship.
Protocol Alpha
Programming language
Symbols
We are going to use the array of LEDs to show symbols. To do this, open de code-editor and start making the code which is shown below.
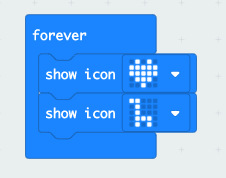
The micro:bit leds wil now alternate between the symbol of a heart and a dinosaur. Effectively showing that you love dinosaurs.
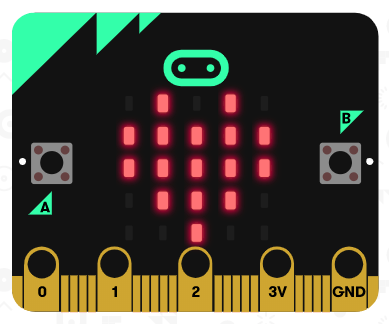
Note that the micro:bit which is shown on screen on the left already shows what will happen once this code is uploaded to a physical micro:bit. Upload this code to your micro:bit to see what happens.
Make your own!
Now these are pre-programmed symbols, which can be very helpful, but you can also make your own symbol. Use the “Show leds” block and click on the cubes to fill them up, this means those LEDs will turn on. Go ahead and make your own symbol of light!
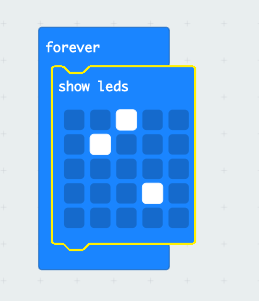
Upload your code to see it in actual light!
Protocol Bravo
Language of programming
Speak up!
Programming is also a language on its own. Sometimes it uses words from your language. Maybe the most important words are ‘IF’ and ‘THEN’. You can use them just as in your language. For example you could say: IF i get cold, THEN I will put on a sweater. This is something a robot can think too!
We are going to make a robot speak up once he sees light. Using the BYOR light sensor and the micro:bit. Connect the light sensor to input 0.
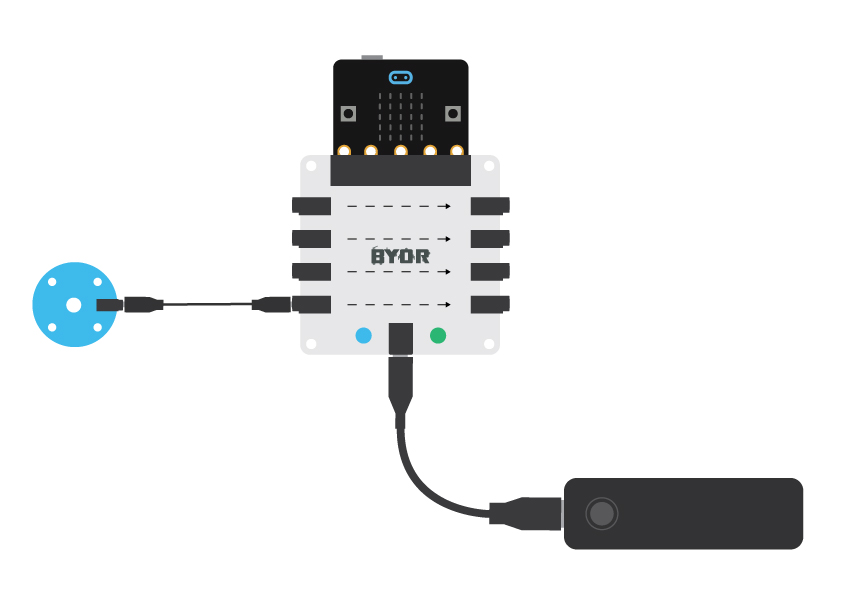 We are going to read the light sensor and IF the light gets bright, THEN the robot will say “Light!”
Create the code shown below, remember you can search for blocks of code using the search bar. The IF block and the comparison block are under Logic.
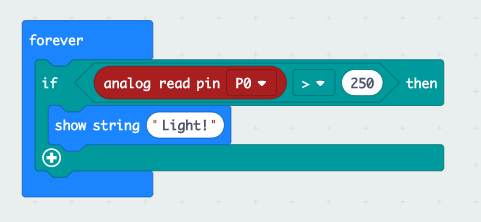
Upload the code, connect a light sensor to your Easyboard (the port that says 0), attach your micro:bit to the Easyboard and power it all!
Use your hand to cover and uncover the sensor. If necessary, shine a light on the sensor to trigger the text.
You can also change the number 250 in the code to finetune when the sensor will work.
Speak Robo!
Now we will make the robot talk with the morse code we used before, as well as the human language english, so aliens can understand as well. We will use the super strong alien LED.
Connect the light sensor and the LED to the Easyboard on port 0 and P13 as shown below.
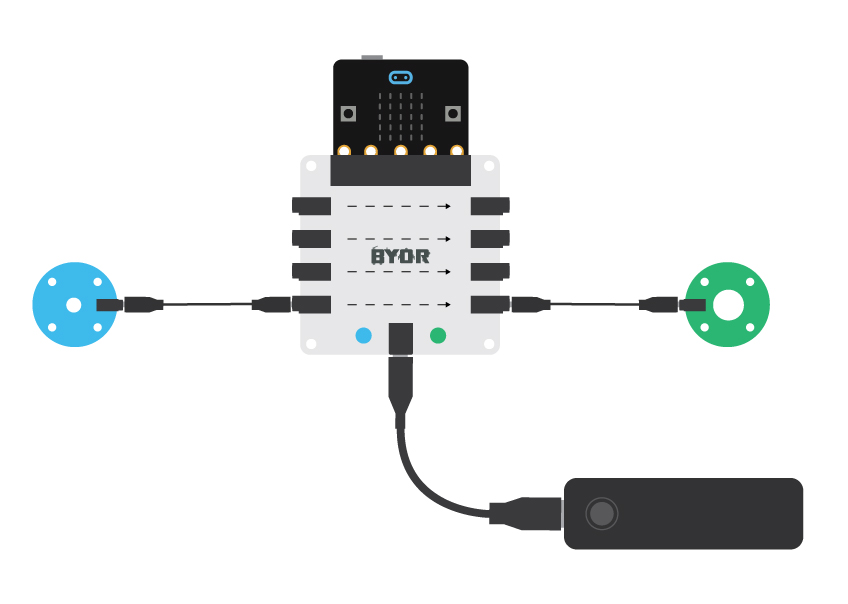
We will send the letter X again when the sensor sees light. See the image below for the code.
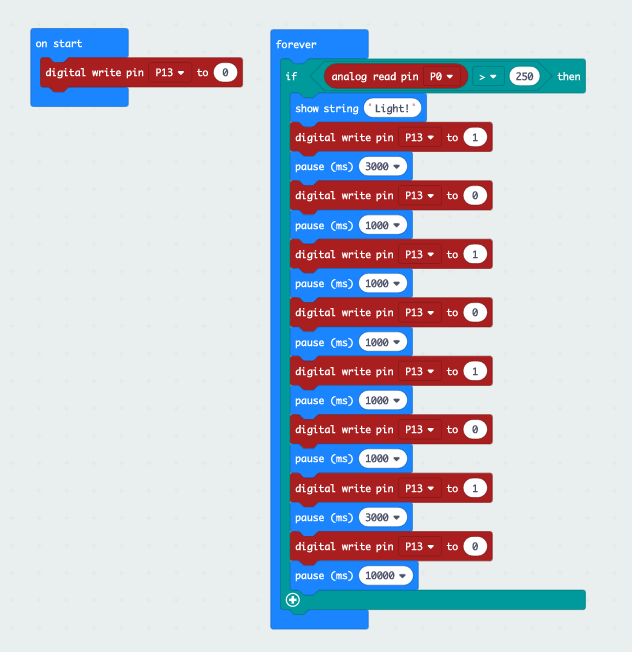
Note that we first set the port for the LED to 0, in the ‘on start’ block. Blocks inside the ‘on start’ block are only done once, and in this case the led is turned off.

Note that we first set the port for the LED to 0, in the ‘on start’ block. Blocks inside the ‘on start’ block are only done once, and in this case the led is turned off.
Protocol Charly
Automatic message
Switch it up
Connect the same hardware as in the previous protocol and open the same code. Change the > signal inside the IF statement to < . The message will now send when it is dark, so it will automatically start when it is best visible. Change the text and the blinking of the LED as you would like it and build the hardware into a messaging device. Place it outside in the dark and test it, to see if it works.
Show us in a video, upload using the portal 🙂
Show us your creation!
Be sure you are logged in to receive your space tokens!
Log in
Upload a video of your creation and send us the link!

